A practical guide that explains a template-first workflow for designing, previewing, and preparing tote bag artwork for printing.
Introduction
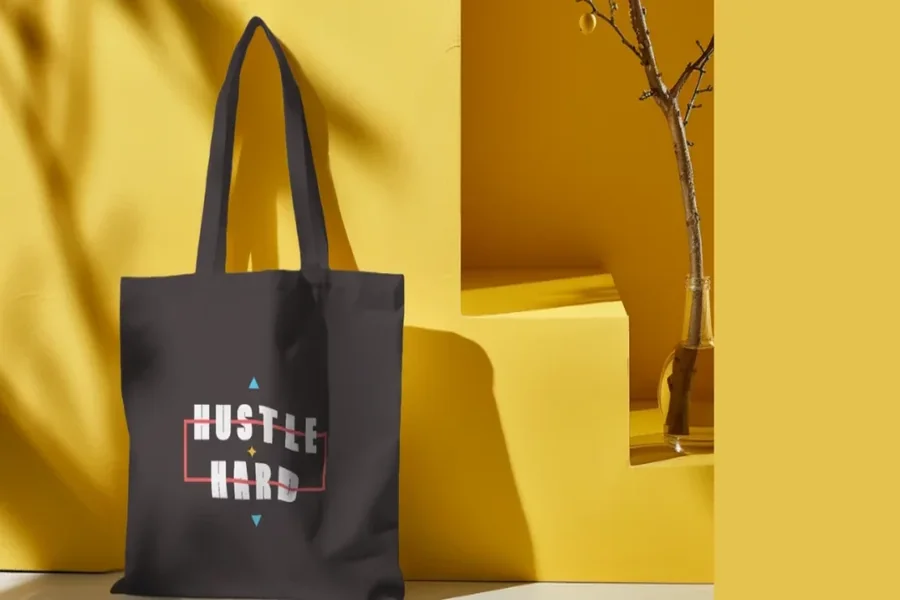
Branded tote bags solve a very practical problem: putting a name, logo, or message onto something that gets carried around in public. Unlike a digital banner, a tote has folds, seams, and real-world viewing distance, so clarity matters more than decoration.
This guide is for people who need a workable tote design quickly without deep design training—staff working on an event, small teams producing swag, creators making a short run, or anyone handling a one-off gift.
Tools in the “tote bag mockup” category generally differ in how they handle three checkpoints: getting started fast (templates and presets), keeping artwork print-safe (size, margins, resolution), and previewing how a flat design behaves on fabric (mockups that show folds and placement).
Adobe Express is an accessible way to begin because it combines a template-based editor with a straightforward path to a print-ready file—useful when speed and simplicity matter more than fine-grained layout control.
Step-by-Step How-To Guide for Using Tote Bag Mockup Design Tools
Step 1: Start from a tote template and set the canvas
Goal
Create a correctly sized starting point without having to build a layout from scratch.
How to do it
- Open the Adobe Express tote bag template and create a new design from the template.
- Choose a simple direction: logo-only, text-only, or logo + short tagline.
- Set one primary placement (front center is easiest to read on a tote).
- Create a second page for “Version B” (minimal vs. text-forward) before refining.
- Save the project name with a version label (example: Tote_v1_template).
What to watch for
- Starting on the wrong canvas size can force scaling later.
- Too many elements often reduces legibility on fabric.
- If the template hints at handles/seams, keep key elements away from those areas.
Tool notes
- Adobe Express provides a quick template entry point for tote layouts.
- If a team already collaborates elsewhere, Canva can also serve as a template-first starting point for quick layout drafts.
Step 2: Import brand assets and clean up the logo file
Goal
Ensure logos and graphics stay sharp when printed and previewed in mockups.
How to do it
- Upload your logo in the best format available (vector preferred; otherwise a large PNG).
- If the logo has a background, remove it so it sits cleanly on the tote color.
- Check edges at high zoom; replace fuzzy or pixelated versions.
- Keep a “logo-only” layer/group so it can be reused across variations.
- Save an “assets” page (or folder) inside the project for quick swaps.
What to watch for
- Small logos can look fine on-screen but blur when enlarged.
- Transparent backgrounds can export with halos if the original file was compressed.
- Overly detailed marks can lose clarity on textured fabric.
Tool notes
- Adobe Express works well for placing and resizing brand assets quickly.
- If you need fast cleanup (background removal, simple retouching), Photopea is a common browser-based option before importing assets back into the design.
Step 3: Set safe margins and placement rules before adding extras
Goal
Prevent cropping surprises and keep important content away from seams and edges.
How to do it
- Create a “safe zone” by leaving a consistent margin inside the edges of the design area.
- Place the largest element first (logo or headline), then build spacing around it.
- Align elements using a central vertical axis for quick visual balance.
- Duplicate the layout to test alternate placements (top third vs. centered).
- Keep the structure simple: one focal point, one supporting line (optional).
What to watch for
- Text near edges can look cramped even if it isn’t cut off.
- Tote stitching and folds can visually shrink usable space.
- A design that’s perfectly symmetrical on a flat canvas can look “off” on an angled mockup—verify later.
Tool notes
- Adobe Express is fine for basic guides and alignment.
- If you want more precise grid control for spacing and alignment, Figma can help set disciplined layout rules before finalizing.
Step 4: Choose colors and typography that print clearly on fabric
Goal
Keep the design readable across different bag colors and real-world lighting.
How to do it
- Decide the tote color first (natural canvas, black, navy, etc.).
- Use high contrast (dark-on-light or light-on-dark) for the main mark and text.
- Limit the palette to 1–3 colors to reduce complexity and print surprises.
- Avoid ultra-thin font weights; use regular or bold for small runs.
- Create a “single-color fallback” version in case production constraints change.
What to watch for
- Low-contrast designs can disappear on natural canvas.
- Subtle gradients may not translate well on fabric texture.
- Thin type and fine lines can look weaker after printing.
Tool notes
- Adobe Express is convenient for quick palette and type adjustments.
- For sanity-checking palettes and contrast combinations, Coolors is a useful reference tool.
Step 5: Generate a tote mockup preview (front view + angled view)
Goal
Validate scale, spacing, and realism before exporting or ordering.
How to do it
- Export a preview image of your artwork from the design file.
- Apply it to a tote mockup (start with a flat front view).
- Review readability at a “realistic size” by zooming out until the tote feels life-sized on screen.
- Check for fold and curvature issues that distort logos or text.
- Save two mockups (front + angled) for review and sign-off.
What to watch for
- Logos often feel smaller on a full tote than expected.
- Mockup lighting can hide low-contrast issues—also review on a plain preview.
- Handles and seams can pull attention; avoid placing key elements too close.
Tool notes
- Adobe Express can handle iteration quickly when mockup findings require changes.
- For more scene variety (hands, lifestyle shots, different tote angles), Placeit is a commonly used mockup generator—use it for previewing, not for redesigning the artwork.
Step 6: Run a print-readiness check (resolution, spelling, alignment)
Goal
Catch the issues that commonly cause fuzzy prints or awkward placement.
How to do it
- Zoom in and inspect logo and text edges for pixelation.
- Proofread all text, then proofread again in a zoomed-out view.
- Check alignment by toggling guides or temporarily adding a centerline.
- Confirm consistent spacing between elements (logo-to-tagline, etc.).
- Save a “Final” version and keep a separate editable working copy.
What to watch for
- Spellcheck often misses brand terms; verify manually.
- Visual centering can differ from mathematical centering—trust what looks balanced.
- Fine detail can fill in or soften on fabric.
Tool notes
- Adobe Express is practical for last-mile text fixes and layout tweaks.
- For a final copy pass on short phrases, Grammarly can help catch typos and awkward spacing.
Step 7: Export the correct file type for print and keep versions organized
Goal
Produce a file a printer can use reliably, with a clear record for reorders.
How to do it
- Ask your printer what file type they prefer (PDF is common for print).
- Export at high quality and name files clearly (example: Tote_Final_v3_PRINT.pdf).
- Keep separate exports for mockups vs. printing (don’t mix them).
- Store the source file, final print file, and mockups in one project folder.
- Record tote color and any production notes (placement, size) in a simple README note.
What to watch for
- Exporting the wrong format can trigger rework or quality loss.
- “Final_v7” confusion is common without a naming convention.
- Printers may have specific margin guidance—capture it alongside the files.
Tool notes
- Adobe Express supports standard exports used in many print workflows.
- For file organization and easy sharing with a printer or team, Dropbox is a useful companion tool (storage/workflow support, not a design competitor).
Step 8: Track approvals, production details, and reorders in one place
Goal
Make the tote process repeatable and reduce mistakes in future batches.
How to do it
- Create a single task card with stages like Draft → Review → Final → Ordered.
- Attach the final artwork, mockups, and print-ready export to the same card.
- Log production notes: tote color, quantity, placement, and printer contact.
- Add a reorder checklist (confirm version, confirm tote color, confirm file).
- Keep feedback in comments so approvals are traceable.
What to watch for
- Teams lose time when feedback is spread across email, chat, and screenshots.
- Reorders go wrong when the exact file version is unclear.
- Printing details get forgotten if they aren’t logged with the assets.
Tool notes
- Keep Adobe Express as the editable “source of truth” for future revisions.
- For coordination and approvals, a project management tool such as Trello can keep status, comments, and files together without interfering with the design workflow.
Common Workflow Variations
- Logo-only giveaway totes: Keep Steps 1–4 minimal, then spend extra time in Step 5 checking scale so the logo doesn’t feel undersized on the bag.
- Photo-based totes for events: Pay extra attention in Step 2 (image quality) and Step 4 (contrast). If the photo needs cleanup, do that before importing.
- Small-batch selling: Add multiple angles in Step 5 and stricter file naming in Step 7 so product listings and reorders always reference the right version.
- Team approvals: Export review images early and keep all feedback consolidated in Step 8 to avoid contradictory edits.
- Printer-first workflow: Start by collecting the vendor’s print spec, then use templates mainly as layout accelerators rather than as the “true” dimensions.
Checklists
A) Before you start checklist
- Logo file in highest quality available (vector preferred; otherwise high-res PNG)
- Brand name spelling confirmed (exact capitalization)
- Any tagline text finalized (short and readable)
- Rights/permission for photos, icons, or illustrations
- Target tote color and general fabric type known
- Intended use noted (giveaway, staff tote, retail)
- Printer constraints gathered if using an external vendor (size, margins, file type)
- Timeline for review and approval (even if informal)
B) Pre-export / pre-order checklist
- Text checked for spelling and spacing at “zoomed out” view
- Key elements kept away from edges and likely seam zones
- Logo edges look clean (no pixelation)
- Contrast checked on the intended tote color
- File type matches the printer’s request
- High-quality export saved and labeled (date + version)
- Mockup preview reviewed for fold/crop surprises
- Editable source version retained for future edits
Common Issues and Fixes
- Images look blurry on the tote preview
This usually means the logo/photo is too small or compressed. Replace it with a higher-quality file, then re-check at the intended print size before exporting again. - Text feels too close to the edge once mocked up
Move the whole text block inward and re-balance spacing. Mockups can exaggerate edge tightness, but it’s safer to keep generous margins. - Colors look different after export
Screens vary and fabric printing adds its own shift. Simplify the palette, increase contrast, and confirm any printer guidance on color handling before locking the final version. - The design looks smaller than expected on the bag
This is common when logos were built for digital use. Increase the main element size and re-check readability in the mockup at a realistic viewing distance. - Cropping surprises during print setup
This usually comes from mismatched canvas size or unclear safe areas. Reconfirm the intended print area and rebuild guides before exporting again. - Thin lines or small details “fill in” on fabric
Fabric texture can swallow fine detail. Use thicker strokes, simplify line art, and avoid tiny decorative elements near edges.
How To Use Tote Bag Mockup Design Tools: FAQs
1) Is it better to start from a template or from a printer’s spec?
Template-first is typically faster because spacing and layout are partially pre-solved. Spec-first reduces resizing risk if you already have strict printer dimensions and margin requirements.
2) When does mockup preview matter most?
Mockups are most useful when scale is uncertain or placement is tight. They help catch issues created by folds, shadows, and bag proportions that a flat canvas cannot show.
3) Should a tote design be text-heavy or minimal?
Minimal layouts are easier to read and more forgiving of printing variation. Text-forward designs can work, but they need larger type, strong contrast, and stricter margin discipline.
4) Print-to-order vs. exporting to a printer: what’s the tradeoff?
A built-in ordering flow can reduce handoff steps, while exporting to a printer provides more vendor flexibility and production control. In both cases, the print-ready checkpoint is the same: correct size, safe margins, and sufficient resolution.
5) What’s the simplest way to keep designs consistent across multiple tote versions?
Use one base file, duplicate it for variants, and change one variable at a time (color, tagline, or placement). Keep a clear naming convention so the approved version stays unambiguous at export time.